Adaptive Cards
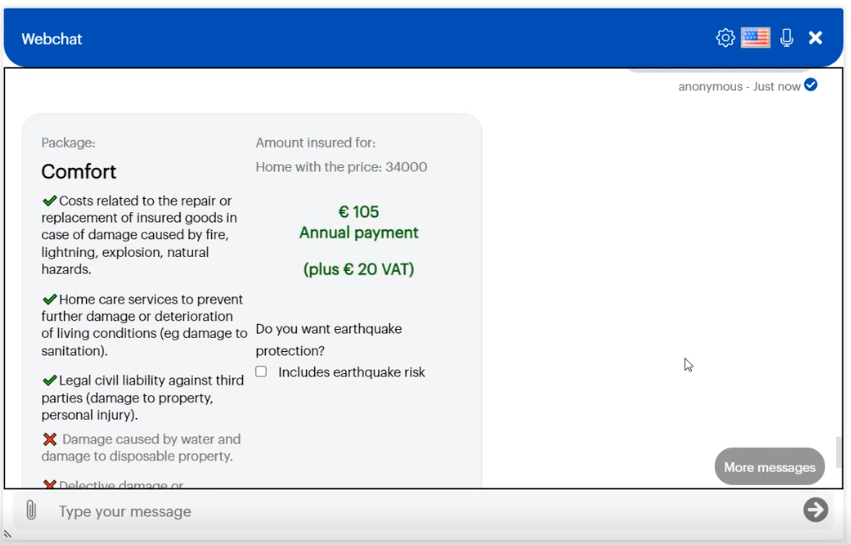
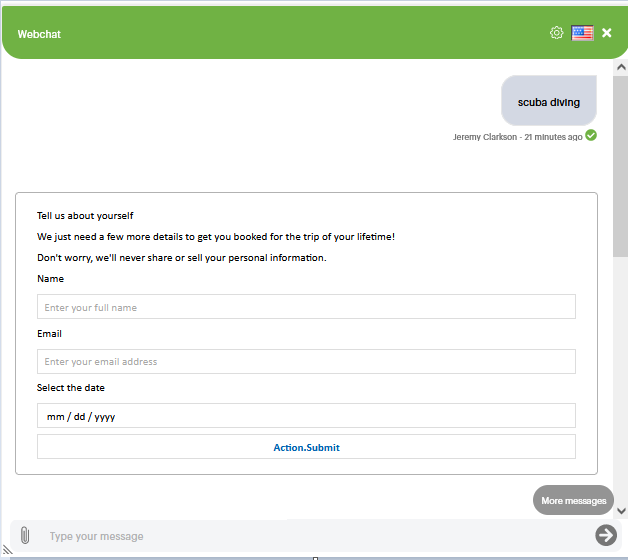
Adaptive cards allows rich display of information in the chat. They are a great fit for AI Agents when you want to render rich text with graphics, provide buttons to allow people to interact with the chat, create interactive forms and collect input from users.
In Druid you author a card once and have it render beautifully inside your own website (web channel) or Microsoft Teams app.
You’ll see a couple of examples of adaptive cards below:
Adding and configuring Adaptive Cards steps
To add and configure an Action step:
- Open the desired flow in Flow Diagram view.
- Expand the Flow Palette, then drag the Adaptive Card step from the Dialog category into the main flow window and drop it onto the step you want to link it to.
- Select the step on the diagram, then click the Settings icon from the Actions menu.
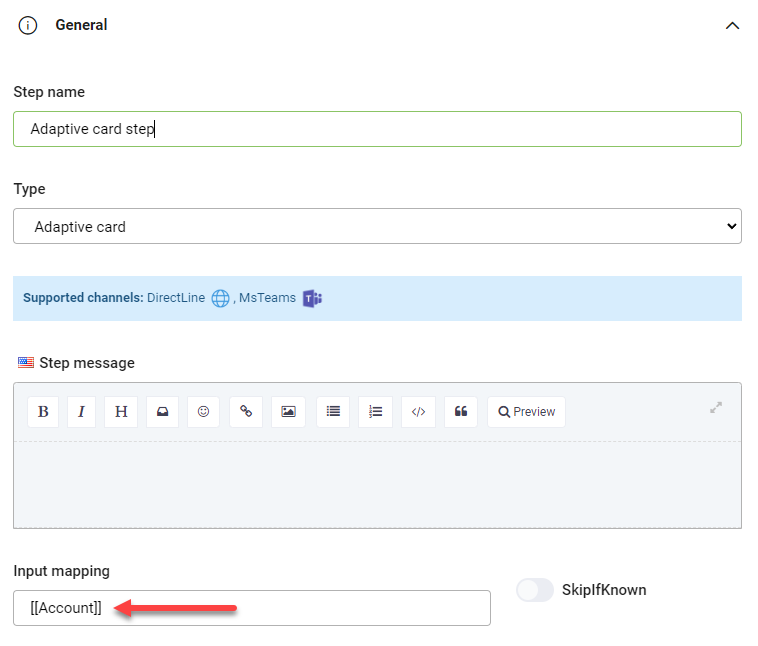
- Set the following General parameters:
- Click on the Metadata section header. The section expands.
- If you want to prevent users from clicking the card twice (or submit field values), tap on Inactivate card after usage.
- Click the Adaptive card editor button (
 ).
). - Design the adaptive card based on your needs. For information on how to use the editor, see Adaptive Card Editor.
- Click the Save button at the top-right side of the editor to save the adaptive card. The editor closes.
- Click Save to save the step configuration.
| Parameter | Description |
|---|---|
| Step name | Enter a descriptive name for the step to clarify its purpose. |
| Step message | (Optional) Enter the message the AI Agent will display when it reaches this step before showing the adaptive card. |
| Input mapping |
NOTE: To capture what the user says use the adaptive card editor and configure the adaptive card directly. DO NOT use Input mapping on the flow step as it does not have any effect on steps of type Adaptive cards.
|
| Hide in conversation history | Anonymizes sensitive data from Input mapping (what the user says) in the conversation history. |
| Disable intent switch | Prevents the AI Agent from doing intent change and keep users in a specific flow whenever data validation fails or when after a step with input mapping when evaluating user input no conditions are met. For more information about this options, see General. |
If you want to put information into a specific context, you can do so, by setting variables on the step. For more information, see Set Variable.
You can also set specific actions to be executed before or after the flow step execution. For more information, see Pre Actions or Post Actions.
Adaptive Card Editor
The image below shows the Adaptive Cards Editor user interface.
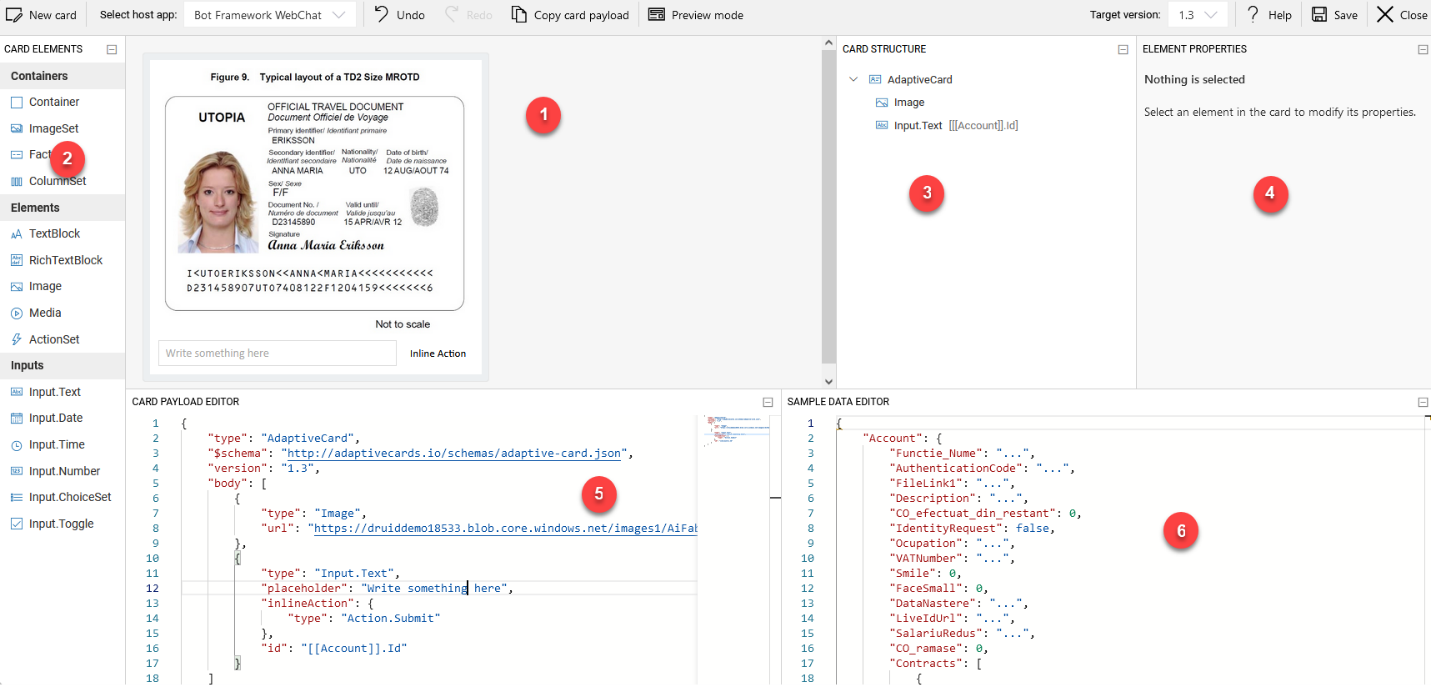
The editor consists of the following areas:
- The visual representation of the adaptive card. You can select and rearrange card objects.
- Elements menu you can drag and drop into your card to customize it as best suits your needs.
- A visual tree view of the adaptive card that corresponds to the actual JSON data.
- Properties for the selected object. You can customize object data such as Label text and Placeholder.
- The live JSON data of the card. You can set the objects properties directly in the JSON (if you prefer using it instead of the properties at the right side of the editor).
- Sample Data Editor. Displays the JSON object of the entity provided in Input mapping on the step (if any).
- You can create only one adaptive card per step.
- An adaptive card can have only one container where you put the desired objects.
- You cannot set multiple selection in adaptive cards.
- You can prevent a specific element property on the adaptive card to be translated if SDL machine translation is enabled on the AI Agent. For more information, see Prevent an element property from being translated at authoring time.
Prevent element properties from being translated at runtime
If SDL machine translation is set on the AI Agent and you want to prevent a specific element property from being translated, in the Card Payload Editor, add the property "<propertyName>#notranslate" to the desired element and set it to true. The <propertyName> is the name of the property to be ignored by machine translation at runtime.
Example:
In this example we prevent the label "Name" from being translated at runtime. In the Card Payload Editor, we identify the label "Name" and add set the following property: "label#notranslate": true.
![]()
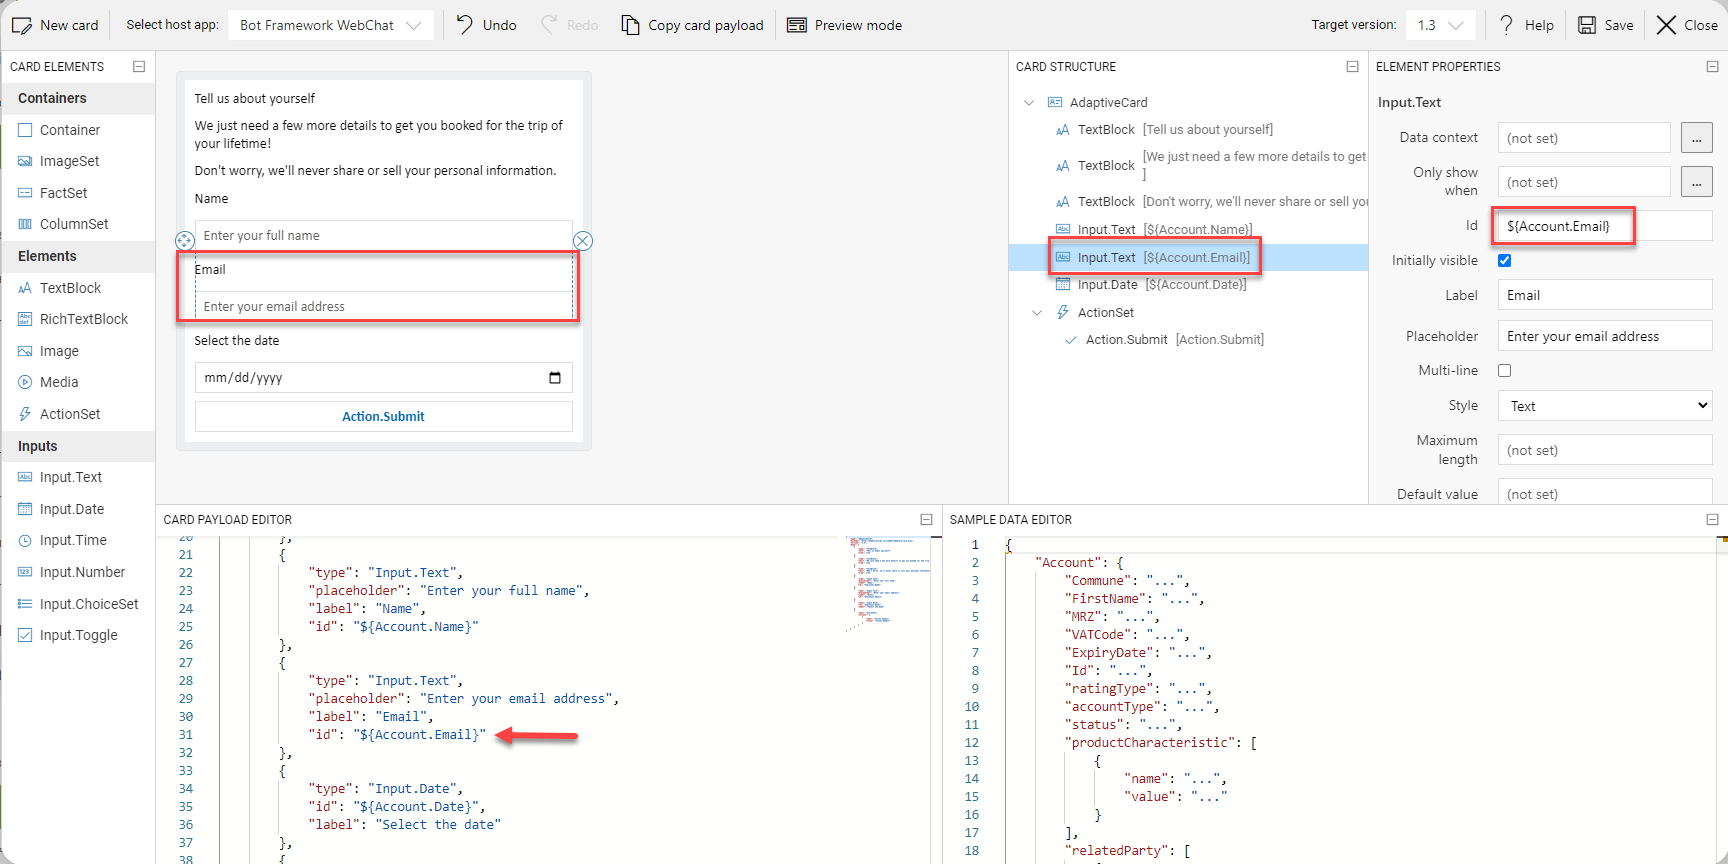
Capturing user input
To capture user input and further use it during the conversation, in the visual tree view of the adaptive card, select the desired input object (input text, input date, input time, input number, input toggle, action) and in the object properties, Id field, enter the Druid entity field that will store what the user says, using the following format: ${Entity.Field}. You can also add it directly in the JSON data.
Druid supports Microsoft Adaptive Cards Template Language
Rendering multiple items from a Druid collection
To render multiple items from a Druid collection on an adaptive card at runtime in the chat, follow these rules:
- Bind the element's $data property to a Druid collection. The element will repeat once for each item in the collection.
- Binding expressions (${myProperty}) in property values are scoped to the individual item within the collection, so you can reference item-level properties directly.
- If binding to a collection of strings, use ${$data} to access each individual string element — for example:
"text": "${$data}"
${Parent.ChildCollection}Handle adaptive cards with multiple buttons using input text
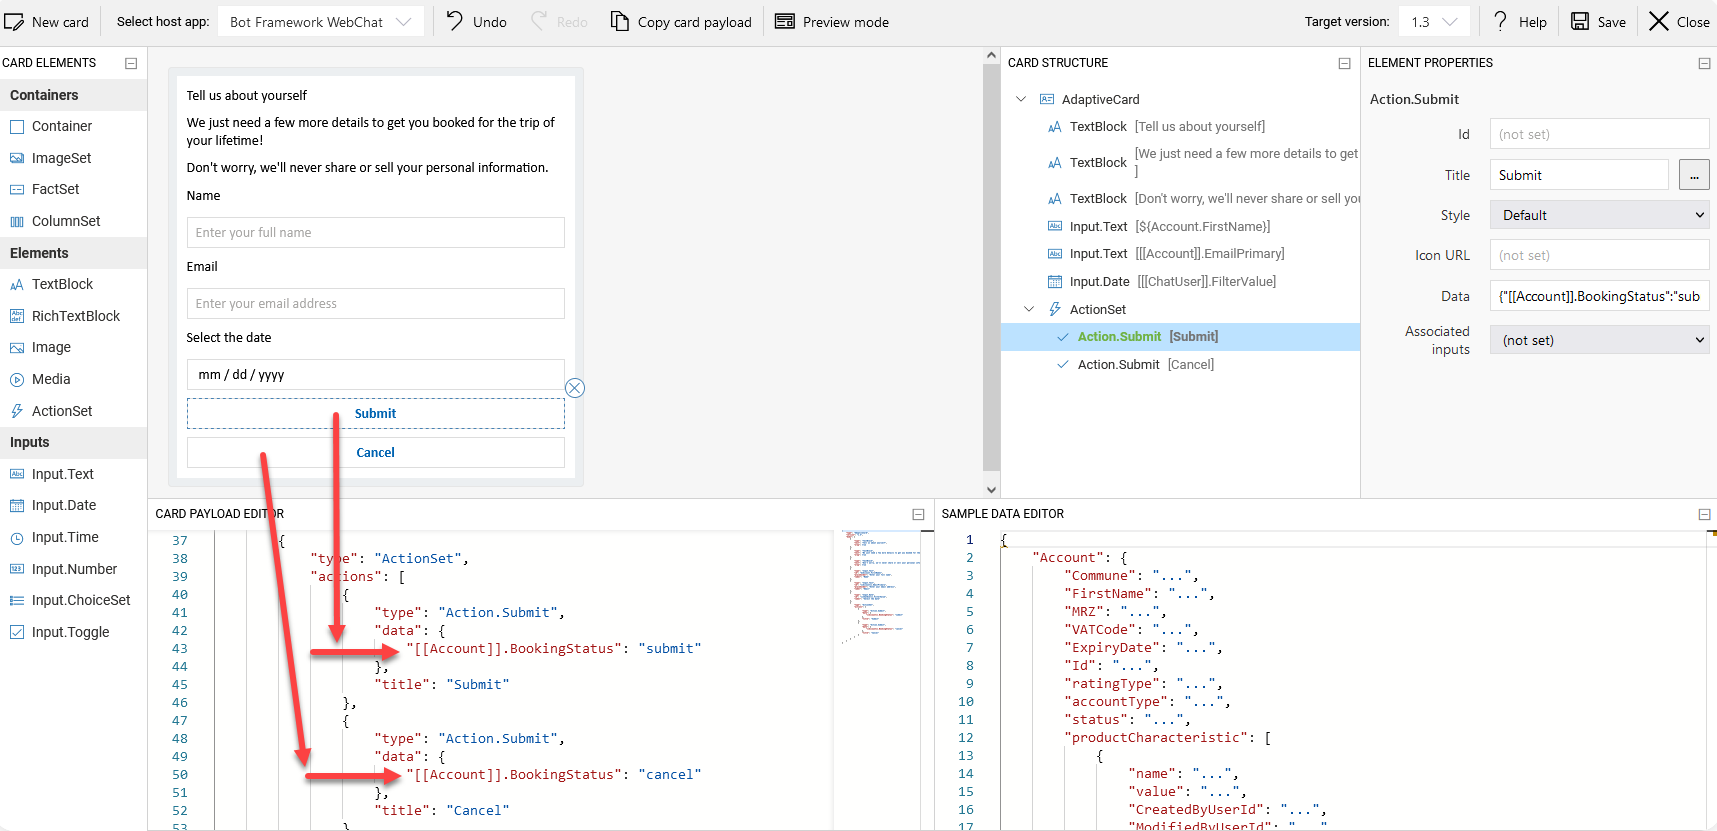
Submitting an adaptive card means sending an adaptive card in the conversation after the AI Agent executes it. When your adaptive card contains multiple submit buttons and you want the AI Agent to continue the conversations based on what button the user clicked, use input text on each button by adding a hardcoded set variable in the Data object of the button using the following format: {"[[Entity]].Field":"<desired input text>"} and design your conversation flow to accommodate the user input / selection on the multiple buttons available in the adaptive card.
For that you can use conditions on steps, execute specific subsequent steps(s) if condition [[Entity]].Field == <desired input text set on specific button> is met.
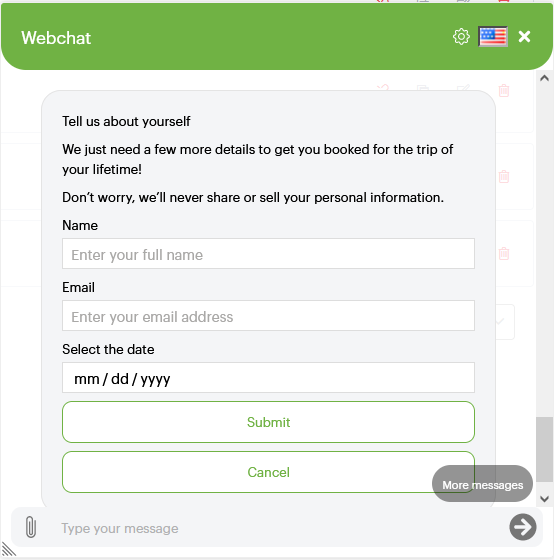
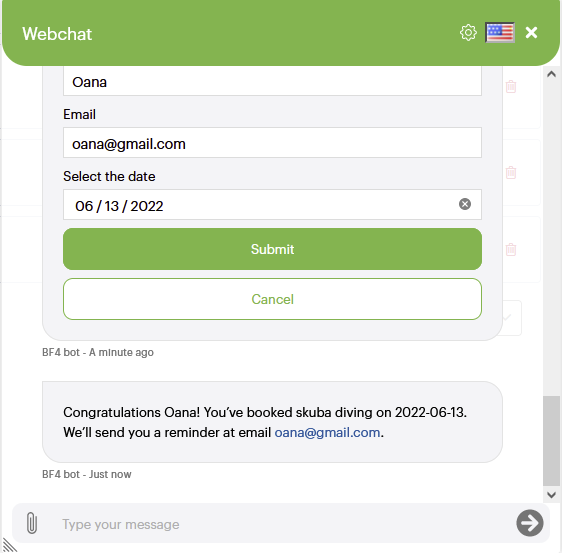
Example: An adaptive card that has two buttons: Submit and Cancel. The AI Agent will address user’s selection differently.
Adaptive card buttons configuration
The flow was designed to address the user’s selection during the adaptive card execution (select one of the two buttons available) as follows:
- Step submit will be executed if condition
[[Account]].BookingStatus == submitis met (that is, the user clicks the Submit button in the chat). - Step cancel will be executed if condition
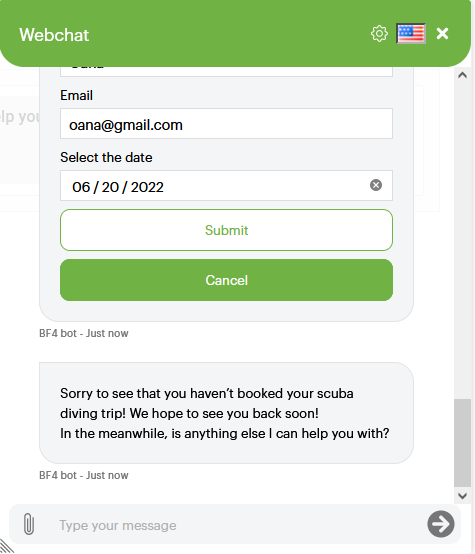
[[Account]].BookingStatus == cancelis met (that is, the user clicks the Cancel button in the chat).
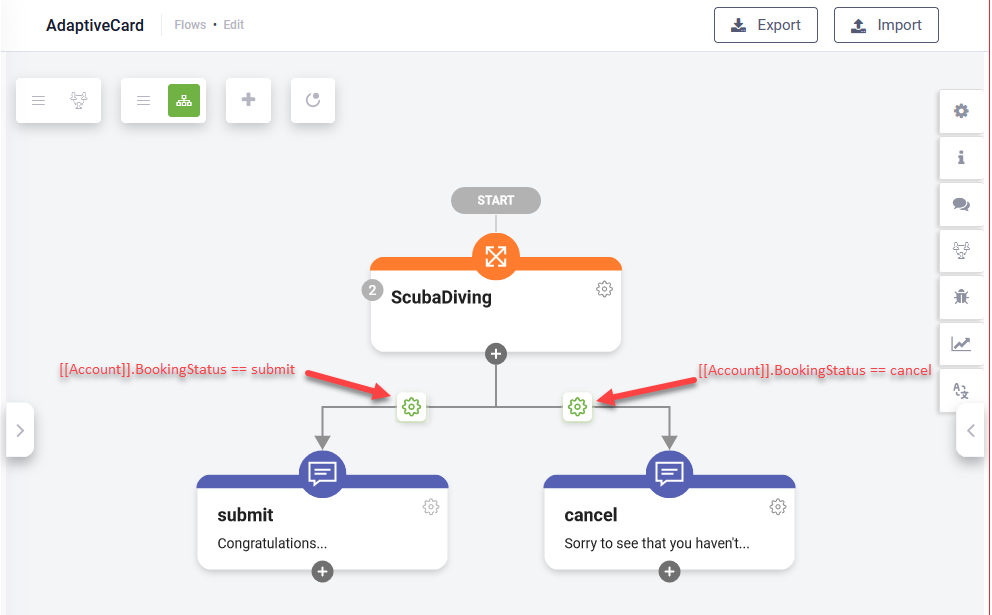
When the user clicks the Submit button, the AI Agent executes step submit.
When the user clicks the Cancel button, the AI Agent executes step cancel.
Manipulate adaptive cards based on context
When customizing adaptive cards to suit specific contextual needs, the Code Extension feature offers a powerful solution. You can seamlessly manipulate adaptive cards, ensuring they adapt dynamically to changing contexts:
- Define the adaptive card object tailored to your specific context.
- Use the
JSON.stringifyfunction to convert the adaptive card object into a string format, enhancing its compatibility with the Code Extension feature: - Assign the JSON object to the adaptive card flow step, enabling it to dynamically adjust based on the defined context:
- Ensure the accuracy and functionality of the flow step code by validating it using:
Example: Build different cards depending on the user authentication state
let adaptiveObject = {};

    //Build different cards depending on the user authentication state
    if ([[ChatUser]].IsAnonymous){
        //for anonymous user we only display the text "Anonymous user"
        adaptiveObject = {
            "type": "AdaptiveCard",
            "body": [
                {
                    "type": "TextBlock",
                    "size": "Medium",
                    "weight": "Bolder",
                    "text": "Anonymous user"
                }
            ],
            "$schema": "http://adaptivecards.io/schemas/adaptive-card.json",
            "version": "1.3"
        }
    }  else {
        //for authenticated user we display the first name and last name of the user
        let firstName = [[ChatUser]].FirstName;
        let lastName = [[ChatUser]].LastName;

        adaptiveObject = {
            "type": "AdaptiveCard",
            "body": [
                {
                    "type": "TextBlock",
                    "size": "Medium",
                    "weight": "Bolder",
                    "text": firstName
                },
                {
                    "type": "TextBlock",
                    "size": "Medium",
                    "weight": "Bolder",
                    "text": lastName
                }
            ],
            "$schema": "http://adaptivecards.io/schemas/adaptive-card.json",
            "version": "1.3"
        };
}; let adaptiveString = JSON.stringify(adaptiveObject);thisStep.Metadata.AdaptiveCard = thisStep.CreateAdaptiveCardObject(adaptiveString);thisStepValidator.Validate(thisStep);